

Table of Contents
- Why DIY Sensory Bins Are Worth the Faff
- How to Make a Sensory Bin (Step-by-Step)
- Safe Sensory Bin Fillers for Toddlers
- Budget-Friendly Sensory Bins That Cost Under £10
- 8 DIY Sensory Bin Ideas for Toddlers (With Themes)
- Sensory Bin Ideas for 2 Year Olds: Age-Specific Tweaks
- Safety, Supervision, and Allergy-Aware Fillers
- Cleanup, Storage, and Reusing Your Bin
- Frequently Asked Questions
Last Updated: October 4, 2026
Why DIY Sensory Bins Are Worth the Faff
A DIY sensory bin is a shallow container filled with safe, toddler-friendly materials that children can scoop, pour, sort and dig through. It sounds simple, and that is exactly the point.
This guide from The Nook and Nurture Company covers eight setups you can build from household materials, plus the safety and storage details most idea lists skip.
The real draw is value for money. A bin built from dried pasta and a washing-up bowl costs pennies, and it can be rebuilt in a different theme next week.
The catch is that "toddler" covers a huge developmental range.
Below, we show you exactly how to build a bin in five minutes, which fillers are safe, and how to adapt each idea as your child grows.
How to Make a Sensory Bin (Step-by-Step)
Building a sensory bin takes about five minutes once you have the materials. The method is the same whether you are making a spring garden or an ocean rescue setup.
What You'll Need
- A shallow plastic tub, washing-up bowl or baking tray with raised sides
- A base filler such as dried rice, pasta shapes, lentils or play sand
- Two or three scoops, cups or spoons
- A selection of small toys to hide and find
- A towel, splash mat or old shower curtain underneath
Step 1: Choose your base. Pour the filler to a depth of 3-5cm. Deeper looks generous but makes finding hidden objects harder for small hands.
Step 2: Add tools. Pop in cups, spoons or a small jug. Scooping and pouring build fine motor skills long before a child can hold a pencil.
Step 3: Hide objects. Bury a few plastic animals or shapes just below the surface. The moment of discovery is what keeps them returning.
Step 4: Set the boundary. Put the bin on a mat and say, "The rice stays in the tub." Expect spillage for the first few sessions. It is part of the learning.
Safe Sensory Bin Fillers for Toddlers
The safest fillers are dry, large and taste-safe: dried pasta shapes, rice, lentils, oats or play sand. Anything small enough to fit through a toilet roll tube is a choking risk and should be avoided for children under three.
A quick way to check any filler is the toilet roll test. If an item passes through the tube, it is too small for a toddler who still mouths objects.
Safe choices include:
- Dried pasta shapes, which are easy to dye with food colouring
- Dried rice, lentils or chickpeas
- Porridge oats, which are cheap and taste-safe
- Play sand for older toddlers who no longer mouth everything
- Cotton balls and large pom-poms for a soft, quiet bin
Water beads deserve a specific warning. They are sold as sensory play material, but they expand significantly when swallowed and have caused serious injuries to young children (Product Safety Alert: Water Beads (PSA7)). We do not recommend them for any bin a toddler can reach unsupervised. The same caution applies to small beads, buttons and uncooked kidney beans.
Budget-Friendly Sensory Bins That Cost Under £10
You can build a complete sensory bin for under £10. Supermarket own-brand pasta, rice and lentils cost very little, and the container can come from your kitchen cupboard.
Here is where the money actually goes:
| Item | Typical Cost | Where to Find It | Reusable? |
|---|---|---|---|
| Dried pasta or rice | Under £1 | Supermarket | Yes, for months |
| Shallow tub or bowl | £0-£3 | Already owned or discount shop | Yes |
| Scoops and cups | £0-£2 | Kitchen drawer | Yes |
| Plastic animals or shapes | £2-£4 | Toy shop or charity shop | Yes |
| Food colouring for dyeing | £1-£2 | Supermarket | Yes, many batches |
The one purchase worth making is a good set of scooping tools. If you want a ready-made option that lasts, our 12x Egg Box Sensory Game at £14.99 gives you a self-contained matching and pulling activity that fits in a changing bag, no filler required.

For a first bin, resist the urge to buy specialist equipment. A washing-up bowl and a bag of pasta will tell you within ten minutes whether your child is a scooper, a sorter or a dumper.
8 DIY Sensory Bin Ideas for Toddlers (With Themes)
These eight setups cover the themes that hold toddler attention longest, from spring gardens to ocean rescues. Each one uses cheap or household materials and takes under ten minutes to assemble.
Spring Garden Bin
Fill a tub with dried green lentils or dyed rice as the "soil". Add plastic flowers, a small trowel and a watering can. Toddlers plant, pull and replant for ages. This is the easiest spring theme to refresh, because you can swap the flowers for mini carrots or butterflies next week.
Ocean Rescue Bin
Blue-dyed rice or water with a splash of food colouring makes the sea. Add plastic sea creatures and a small net or spoon. The rescue narrative gives the play a purpose: "The turtle is stuck, can you help?" This theme works brilliantly alongside our Water Play Mat at £12.99 for younger siblings who are not ready for a full bin.
Alphabet Hunt Bin
Bury foam or magnetic letters in rice and let your toddler dig them out. Say the letter sound as each one appears. This is name recognition in disguise, and it works best when you start with the letters in your child's own name. For a portable version, our Sensory Busy Book at £34.99 covers buttoning, zipping and lacing for the same fine motor muscles.
Dinosaur Dig Bin
Sand or dried lentils plus plastic dinosaurs equals an instant excavation site. Add a paintbrush so your toddler can "brush" the sand away. This one suits slightly older toddlers who understand the idea of digging carefully.
Farmyard Bin
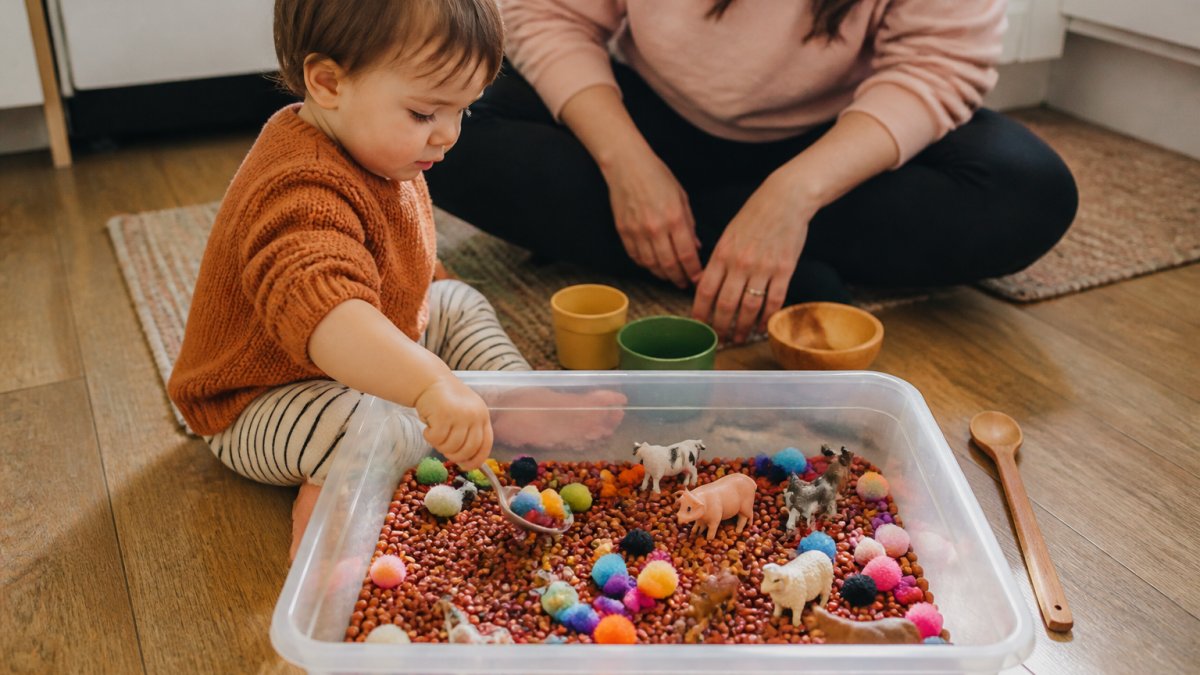
Dried corn or oats as the field, plastic animals as the residents. Add a small cup for "feeding" the animals. The repetition of scoop, pour, feed is exactly the kind of play that builds hand control.
Colour Sorting Bin
Fill a tub with mixed pom-poms and provide cups in matching colours. Your toddler sorts each pom-pom into its cup. Start with two colours and add more as they master it. This is one of the few bins that works for a wide age range.
Texture Exploration Bin
Use cotton balls, large pom-poms, felt scraps and smooth wooden blocks. No filler, no mess. This is the bin to reach for when you want quiet play rather than a full clean-up, and it suits children who dislike the feel of dry rice or sand.
Counting Bin
Bury ten identical objects, such as plastic eggs or counting bears, in rice. Your toddler finds them and lines them up. Count aloud as each one appears. Ten is plenty; more becomes a chore rather than a game. Our Sensory Ball Pack at £9.99 is a good companion for texture work with younger toddlers.

Sensory Bin Ideas for 2 Year Olds: Age-Specific Tweaks
Two-year-olds need bigger fillers, fewer objects and constant supervision. At this age, the mouth is still part of how children explore, so every item in the bin must pass the toilet roll test.
Adjust your bin like this as your child grows:
- 12-18 months: Large pom-poms, big pasta shapes and soft fabric only. Sit beside them the whole time.
- 18-24 months: Add scoops and cups. Keep fillers large and taste-safe.
- 2-3 years: Introduce sorting, counting and themed bins. Still supervise closely.
- 3-4 years: Smaller fillers become safer, and you can add tongs, tweezers and more complex hiding games.
The mistake most parents make is building one bin and expecting it to work for years. A bin is a moving target. Rebuild it every few weeks with a new theme, and you will get far more play out of the same handful of materials.
Safety, Supervision, and Allergy-Aware Fillers
No sensory bin is safe unsupervised for a toddler. Choking is the main risk, and it is highest with small, round or slippery items.
Three rules cover most of it. First, apply the toilet roll test to every item. Second, supervise actively rather than leaving the room, even for a minute.
Allergy-aware swaps are straightforward. If your child has a food allergy, avoid using that food as a filler, even if they will not eat it, because toddlers put things in their mouths.
For children with sensory sensitivities, offer a bin with larger, softer materials and let them approach it at their own pace. Some toddlers need to watch for a few sessions before they will touch anything.
Cleanup, Storage, and Reusing Your Bin
Dried fillers such as rice, pasta and lentils can be reused for months if you store them properly. Tip them into a sealed container or zip bag once play is finished, and they will keep until the next session.
Sweep up spills straight away rather than waiting. Rice and lentils attract pests if left in corners, and a quick tidy keeps the bin a yes rather than a hassle.
For storage, stack your bins and keep the fillers in labelled tubs so you can rebuild a theme in seconds. If you want a bin that needs no filler at all, our Rainbow Rainmaker Sensory Toy at £7.99 delivers the same cause-and-effect learning with no clean-up, and our Newborn Sensory Box at £48.99 covers the earlier stages for a younger sibling.

Retire any filler that is cracked, chewed or damp. Replace it rather than risk a splinter or a mould problem.
Building a sensory bin that actually gets used takes a bit of trial and error, and the materials matter as much as the theme.
Frequently Asked Questions
What are some good DIY sensory bin fillers for toddlers?
Good fillers for a sensory bin include dried beans, popcorn kernels, cotton balls, pom-poms, play sand, and shredded paper. For toddlers who still mouth everything, choose taste-safe options like cooked pasta or plain porridge oats. Always supervise play so nothing goes in the mouth.
How do you make a sensory bin for a toddler?
Start with a shallow plastic tub or tray at least 5cm deep. Add a base filler, then place 5 to 8 small items on top: cups, scoops, tongs, plastic animals, or wooden blocks. Keep the theme simple, like ocean or spring, and leave room for little hands to dig. Set it on a wipeable mat or old towel to catch spills, and show your toddler how to scoop before stepping back.
What are some budget-friendly sensory bin ideas?
You do not need to spend much. Dried rice, lentils, and porridge oats cost under £2 per bag and last for weeks. Reuse ice cream tubs, muffin trays, and yoghurt pots as scoops and containers. Charity shops often sell plastic animals and measuring cups for pennies. A basic bin setup can cost under £5, and the 12x Egg Box Sensory Game at £14.99 or the Sensory Ball Pack at £9.99 make good reusable additions.
How long should a toddler play with a sensory bin?
Most toddlers stay engaged for 10 to 20 minutes, though some will happily play for 30 minutes or more. Watch for signs of boredom or frustration, like throwing filler or walking away. It is better to pack it up while they are still interested than to push for longer. You can always bring the bin out again later the same day.
How do you keep a sensory bin from getting messy?
Place the bin on a large towel, shower curtain, or wipeable mat before play starts. Use a shallow tub with high sides so filler stays contained. Keep a small dustpan and brush nearby for quick cleanups. After play, pour the filler into a sealed zip bag or airtight container, and store the whole bin on a shelf out of reach so it stays tidy between sessions.


