

Last Updated: November 1, 2026
Quick Summary
The best window guards for child safety are fixed guards or cable restrictors that limit how far a window can open, set to a tested maximum that suits your child's age and climbing ability. Choose a key-operated model for older children and younger toddlers, and always keep an emergency escape route for adults.
- Window guards, restrictors and locks do different jobs, so choose based on your home.
- Look for a stated test standard and opening limit in the product documentation.
- Key-operated restrictors suit under-fives and children who can climb; keyless suit younger children.
- Measure the actual opening at the widest point with the window fully open.
- Check each restrictor every six months and after any furniture or building changes.
Table of Contents
- Window Guards, Restrictors and Locks: What Each One Does
- How to Pick a Safe Opening Limit for Your Child
- Window Restrictors for uPVC Windows and Other Frame Types
- Key-Operated Versus Keyless Options Compared
- Fitting Considerations and Installation Quality
- Childproof Window Locks and Emergency Escape Rules
- Checking and Maintaining Your Window Restrictors Each Year
- Frequently Asked Questions
Choosing window guards for child safety is one of the most important decisions a parent makes when childproofing a home. Falls from windows remain a serious risk for young children, and the right hardware can help prevent them.
Window guards, restrictors and locks are not the same thing, and they do different jobs. A restrictor limits how far a window can open. A guard is a fixed barrier across the opening.
Window Guards, Restrictors and Locks: What Each One Does
Window guards and restrictors sit at the heart of most childproofing plans. Each type works in a different way, so it helps to understand the trade-offs before you buy.
Fixed and permanent guards
A fixed guard is a metal or strong mesh barrier screwed into the window frame or wall. It stops a child from passing through the opening, whatever the window's position. Guards suit ground-floor rooms and situations where you want a strong physical barrier. The drawback is that a fixed guard also blocks adult escape, so it must be paired with a clear emergency plan.
Cable and sash restrictors
Cable restrictors are the most common option in UK homes. A steel cable runs from the sash or casement to the frame, stopping the window opening beyond a set gap. Sash restrictors work in a similar way on sliding windows. Both are usually fitted without tools beyond a screwdriver and are easy to adjust. Because the opening can be released by an adult, they keep escape routes available while still limiting how far a child can push a window open.
How to Pick a Safe Opening Limit for Your Child
A safe opening limit depends on your child's age, size, climbing ability, and the layout of the room. It also depends on whether the restrictor has been tested to a recognised standard, because a product that claims a particular limit but fails under load is not safe at all.
Start with the standard, not just the number
When you shop, look for a stated test standard in the product documentation, and ask the retailer for supporting test information. If a product has no stated standard, treat its opening limit as a claim rather than a verified performance figure.
Match the limit to your child's climbing profile
A toddler who has just learned to walk needs a different limit from a five-year-old who can drag a chair to the window. Use this rough guide, then adjust for your own child:
- Under 2 years: Check that the restrictor cannot be defeated by a child pressing or pulling on the window. Fixed restrictors or key-operated cable restrictors are preferable to keyless push-button models at this age.
- 2-4 years: Climbing starts here. Set the limit as tight as the window allows, and remove or secure any furniture that gives a step up to the sill. A key-operated restrictor prevents a child from releasing the window after watching you do it.
- 5-7 years: Children can reason and imitate. They may learn to use a keyless release. Consider a key-operated restrictor with the key stored out of reach but accessible to an adult in an emergency. Reassess the limit if your child can reach the window handle from a bed or sofa.
Measure the actual opening when the window is fully open, not the frame size. Use a tape measure at the widest point, and check the gap at the bottom, middle, and top of the opening, some restrictors allow the window to skew slightly, creating a wider gap at one corner.
Account for room layout and supervision
A window above a bed, sofa, or toy chest is a climbing invitation. Even a 100mm gap can be dangerous if a child can stand on furniture and lean through it. Walk through each room and ask:
- Can a child reach the window sill from any piece of furniture?
- Is the window in a room where supervision is lower, such as a bedroom or playroom?
- Does the window open onto a hard surface, a balcony, or a drop of more than two metres?
If the answer to any of these is yes, set the limit tighter and choose a restrictor that is harder to defeat. In rooms with low supervision, a key-operated or fixed restrictor is a better match than a keyless model.
Finally, remember that the opening limit is only one part of the system. The restrictor must be fitted correctly, checked regularly, and paired with a clear emergency release plan. The next sections cover those points in detail.
Window Restrictors for uPVC Windows and Other Frame Types
Frame material affects which restrictor fits and how it must be secured. Most modern UK homes use uPVC casement windows, while older properties often have timber or aluminium frames.
Fixing points differ between materials. uPVC frames usually take screws into the profile, and a restrictor must be fitted into solid frame sections rather than hollow areas. Timber frames tend to accept screws easily, but the wood can split if fixings are placed too close to the edge.
Key-Operated Versus Keyless Options Compared
Restrictors come in key-operated and keyless versions, and each has a clear use.
Key-operated restrictors lock the window at the chosen gap until an adult uses a key.
Keyless restrictors use a release button or push mechanism that an adult can operate without a key. They are quicker to use day to day.
Weigh the trade-offs against your household. Consider who needs to open the windows, how quickly they may need to, and whether children can reach the release.
Fitting Considerations and Installation Quality
A restrictor is only as safe as its fitting. Poor installation is one of the most common reasons childproofing fails, and the difference between a secure restrictor and a loose one often comes down to a few millimetres of fixing placement and the right screw for the frame material.
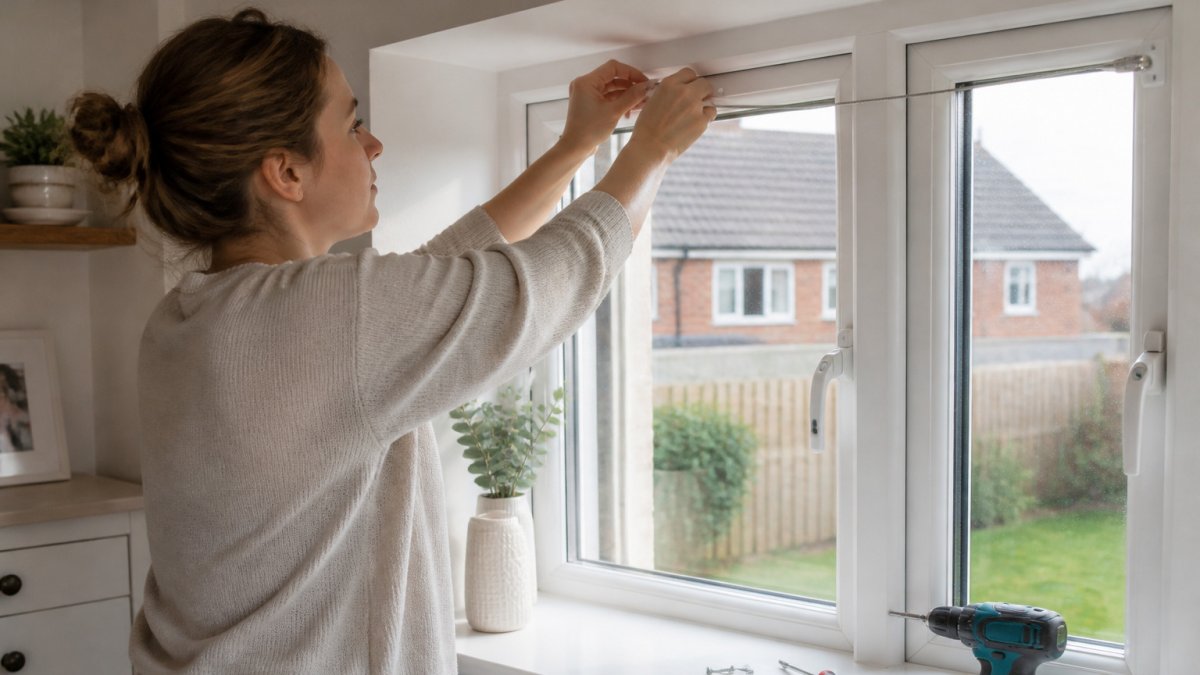
Before you drill: a five-point check
- Confirm the frame is solid at the fixing point. Tap the frame where you plan to fit the restrictor. A hollow sound means you are over a drainage channel or a hollow profile section. Move the fixing point 20-30mm along the frame until you find a solid section. On uPVC windows, the reinforced steel core is usually visible as a series of small ridges or a darker line inside the profile, fix into that zone.
- Check the window's opening direction and swing. A restrictor fitted to the wrong side of a casement will bind or fail to limit the opening. Open the window fully and watch which way the sash swings. The restrictor arm or cable should be on the hinge side for casement windows, and on the sliding sash for vertical sliders.
- Use the fixings supplied with the restrictor. Do not substitute shorter or longer screws. Restrictor screws are usually designed to bite into the frame without piercing the drainage channel. If you lose one, contact the manufacturer for a replacement rather than raiding a general screw tin.
- Pre-drill timber frames. Timber can split if a screw is driven too close to the edge. Drill a pilot hole 1mm smaller than the screw shank, and keep the fixing at least 15mm from the frame edge.
- Check the restrictor's stated frame compatibility. Some restrictors are designed for uPVC only and will not sit flush on an aluminium or timber frame. The packaging or product page should state which materials the fixings are rated for.
Common failure points by frame type
- uPVC: The most common failure is fixing into a hollow profile section, which allows the screw to pull out under load. Another is over-tightening the screw, which can crack the profile. Use a screwdriver with a clutch or a low-torque drill setting.
- Timber: Splitting at the frame edge is the main risk. Pre-drill and keep fixings away from the edge. Check for rot or soft wood around the fixing point, a restrictor screwed into decayed timber will not hold.
- Aluminium: Aluminium frames can be thin-walled, and standard screws may not bite. Use the fixings specified for aluminium, and consider a rivet nut or a machine screw with a nut on the inside if the frame is hollow. Check for galvanic corrosion if the restrictor is a different metal from the frame.
After fitting: test, then test again
Once the restrictor is fitted, open the window fully and confirm it stops at the set limit. Then apply firm pressure in the direction a child would push or pull. The restrictor should not flex, slip, or make a cracking sound. If it does, refit it or replace it, do not rely on a restrictor that moves under load.
Ongoing inspection schedule
Fitting is not a one-off job. Set a reminder to check each restrictor every six months, and again after any of the following:
- A window has been cleaned or operated forcefully.
- A child has tried to force the window open.
- There has been building work or decoration near the window.
At each check, look for loose screws, frayed cables, worn release mechanisms, and any sign that the restrictor has been tampered with. Clean the mechanism with a dry cloth and apply a silicone-based lubricant to moving parts if the manufacturer recommends it. Replace any damaged parts promptly, and keep a simple record of the date and outcome of each check.
The article gives a five-point checklist for fitting a restrictor safely, with the main risks for each frame type.
| Check | Why it matters |
|---|---|
| Confirm frame is solid at fixing point | Hollow profiles let screws pull out under load |
| Check opening direction and swing | Wrong side will bind or fail to limit opening |
| Use the supplied fixings only | Restrictor screws are designed not to pierce drainage channels |
| Pre-drill timber frames | Timber splits if screws sit too close to the edge |
| Check stated frame compatibility | Some restrictors fit uPVC only, not aluminium or timber |
Childproof Window Locks and Emergency Escape Rules
Locks and restrictors help prevent falls, but they must never trap anyone inside during a fire or other emergency. Every room used for sleeping should have a clear, quick route out for adults.
Choose a restrictor that an adult can release quickly, and keep any key in a known place close to the window. Teach older children how the release works so they can get help.
Checking and Maintaining Your Window Restrictors Each Year
Window restrictors need regular checks to keep working. Wear, paint and loose fixings can all reduce their effectiveness over time.
Once a year, test each restrictor by trying to open the window past the set limit. Look for loose screws, frayed cables and worn release mechanisms.
Routine maintenance takes only a few minutes per window, and it keeps your child protected as the hardware ages.
Frequently Asked Questions
What is the safest type of window restrictor for children?
A restrictor that cannot be released by a child is the safest choice. Key-operated restrictors keep the key out of reach, and permanently fixed restrictors remove the option to override the limit altogether. Cable restrictors are common and affordable, but check that the cable is secured at both ends and that the stop cannot be pulled free by a determined child. Whichever type you choose, test it by trying to open the window from a child's height and confirm the limit holds.
Are window restrictors suitable for every type of window?
Most restrictors suit casement, top-hung and tilt-and-turn windows, but not every window style accepts every product. Sliding and sash windows often need a different sash jammer or limiter. Check the manufacturer's compatibility list for your frame material, including uPVC, aluminium and timber, before buying. If your window is unusual or the frame is damaged, ask a qualified installer to confirm the right product.
How far should a window open with a child safety restrictor fitted?
Limit the opening to a gap that is too narrow for a young child to climb through, and check it against the product's tested limit. Restrictors are usually adjustable, so you can set the stop to the gap you want. Remember that the limit must still allow adults to ventilate the room and, where the window is an escape route, that it can be opened fully in an emergency. Keep the setting consistent across all upstairs windows.
Do window restrictors affect emergency escape?
They can, if fitted or set incorrectly. Bedroom windows that serve as an escape route should be openable quickly by an adult. A keyless restrictor that can be released by hand, or a key kept in a known place near the window, helps balance child safety with emergency egress. Check your local fire risk assessment and speak to your landlord or fire safety adviser if you are unsure.
Protecting your child from window falls is about choosing the right type of guard, setting a safe opening limit, fitting it properly and keeping it in good condition. At The Nook and Nurture Company, we are here to help you find the childproofing essentials that fit your home and your family's needs. Browse our range to get started, and enjoy the peace of mind that comes with a safer home.


