

Table of Contents
- Small Nursery Storage Ideas That Actually Free Up Floor Space
- DIY Nursery Bookshelf: Three Builds From One Weekend
- Nursery Wall Shelves: Sizes, Heights and Fixings That Hold
- Leather Strap and Rope Shelves: Renter-Friendly Hanging Storage
- Nursery Shelf Styling That Survives a Toddler
- Making DIY Nursery Shelves Safe: The Checks That Matter
- Shop-Bought Shelving That Saves You the Build
- Conclusion
- Frequently Asked Questions
Last Updated: October 19, 2026
Small Nursery Storage Ideas That Actually Free Up Floor Space
A small nursery has one enemy: the floor. Once a cot, a changing table and a feeding chair are in, every square centimetre counts.
The principle behind all seven builds: vertical storage is the only storage that costs you nothing in floor space. A wall shelf uses air; a bookcase uses floor.
Below: a weekend bookshelf build, wall shelf sizes and fixings, renter-friendly hanging options, toddler-proof styling, and the safety checks that matter most.
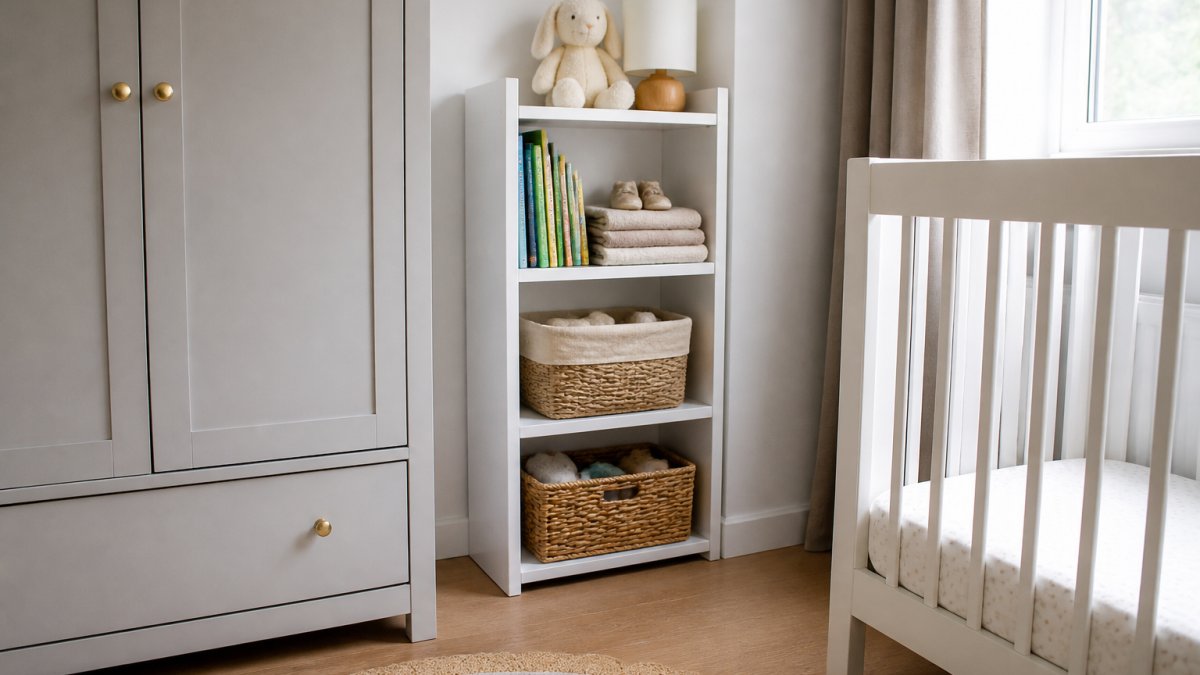
DIY Nursery Bookshelf: Three Builds From One Weekend
A DIY nursery bookshelf is the fastest way to reclaim floor space, and all three builds can be finished in a weekend with basic tools. Two are genuinely cheap; the third is a conversion rather than a build.
| Build | Materials | Approx. Cost | Time | Tools Needed |
|---|---|---|---|---|
| Crate-and-batten bookshelf | 4 wooden crates, 2 battens, screws | Under £25 | 2-3 hours | Drill, saw, sander |
| Spice-rack picture-book shelf | Second-hand spice rack, brackets | Under £15 | 45 minutes | Drill, screwdriver |
| Wall-mounted picture ledge | 1.8m timber batten, 2 brackets | £15-£30 | 1 hour | Drill, level, saw |
The Crate-and-Batten Bookshelf (Under £25)
Our first recommendation for a tight room. Four wooden crates stacked two-by-two and screwed to two vertical battens make a sturdy, shallow bookcase roughly 60cm wide and 60cm tall, only about 30cm deep.
What you need: four wooden crates, two 1.8m timber battens (about 2cm x 4cm), wood screws, a drill, a saw, sandpaper and a stud finder.
Steps:
- Sand every crate edge until smooth. Skip this and you will find splinters within a week.
- Cut the battens to the height of your stack, roughly 60cm for two crates.
- Screw the bottom crate to both battens, then stack and fix the crate above it.
- Sand again, then paint or leave natural.
- Fix the whole unit to the wall through the battens into a stud, or use appropriate plasterboard fixings.
The Spice-Rack Turned Picture-Book Shelf
A second-hand wooden spice rack is almost the perfect picture-book shelf: shallow, slatted, and just deep enough for a few front-facing books. Mount it at 90cm so a toddler can reach it and you have a display shelf for under £15. Check it is solid wood rather than thin veneer, sand the edges, and fix it with two brackets into a stud. Front-facing books get picked up far more often than spines, which is the whole point.
Nursery Wall Shelves: Sizes, Heights and Fixings That Hold
Nursery wall shelves work when four numbers are right: depth, height, spacing and fixing type.
Depth: keep shelves at 15-20cm. Deeper shelves invite clutter and put heavy items further from the wall, increasing the pull on fixings.
Height: 90-110cm for anything a toddler should reach, and above 140cm for decorative items only.
Spacing: leave 30-35cm between shelf surfaces for picture books and 20-25cm for board books and small baskets.
Fixings: always into studs where possible.
Small-space layouts that work:
- The chimney-breast alcove: a 60-80cm shelf spanning the recess at 100cm, with a second at 140cm, turns dead wall into two tiers of storage without stealing floor.
- The over-door strip: a 15cm-deep shelf at 180cm above the door holds out-of-season clothes and blankets in baskets, using wall space that is otherwise empty.
- The corner triangle: two 45cm shelves meeting at 90 degrees in a corner give a small display ledge for a night light and a few keepsakes without blocking the walkway.
- The changing-table wall: a 90cm shelf at 120cm, above the reach of a standing toddler, holds nappies, wipes and cream in one basket so the changing surface stays clear.
If you cannot find a stud, a guide to wall fixings from a UK construction body is worth ten minutes before you drill.
Leather Strap and Rope Shelves: Renter-Friendly Hanging Storage
Renting rules out most wall fixings, so hanging storage is the practical answer. A leather strap or rope shelf needs just two hooks and a plank, and comes down in minutes with minimal damage.
What you need: two leather straps or lengths of natural rope (about 1.5m each for a 90cm plank), a 90cm plank of 18mm timber, and two heavy-duty screw hooks rated for the load.
The build:
- Sand the plank edges and treat with a child-safe oil or paint if you want a finish.
- Mark two hook positions 60-70cm apart for a 90cm plank and check with a spirit level.
- Fix the hooks into studs where possible. If renting and you cannot find a stud, use removable adhesive hooks rated for at least twice the planned load.
- Thread the straps through the hooks, knot underneath, and rest the plank on top. Adjust the knots until level.
- Pull down firmly before loading. If the hooks move or the knots slip, the fixing is wrong.
Load limits: rope and strap shelves flex under weight, so they suit display and light storage rather than a full library, a few board books, a basket of muslins, a night light or framed pictures.
Small-space placements that work:
- Above the changing table: a 60cm strap shelf at 130cm holds a basket of nappies and wipes, out of a toddler's reach but in yours.
- Beside the feeding chair: a 45cm shelf at 100cm holds a water bottle, muslin and a book, so you are not getting up mid-feed.
- In the corner behind the door: a narrow 40cm shelf at 150cm uses the strip of wall the door hides when open.
Damage-minimising tips for renters:
- Test removable adhesive hooks on an inconspicuous patch first; some paints and wallpapers release more easily than others.
- Keep screw-hook installations to a minimum and fill the holes before you move out.
- Choose a plank you can repurpose later, a bathroom shelf or kitchen spice rack beats a single-use build.
Nursery Shelf Styling That Survives a Toddler
Nursery shelf styling fails when it is designed for photographs rather than for a child. Style for reach, not looks, and the shelf stays tidy for longer than a week.
- Put the things they can touch on the bottom shelf: board books, a soft toy, a basket of blocks.
- Keep the top shelf for the breakable, the sentimental and the small.
- Use one basket per shelf to swallow the small bits that otherwise migrate to the floor.
- Group by colour or theme so returning items is obvious, even to a two-year-old.
- Leave gaps. A shelf at 70% capacity looks styled. A full shelf looks like a spill waiting to happen.
Stuffed animals are the usual culprit. Rotate them: three out, three stored, and the shelf stays a display rather than a pile.
Making DIY Nursery Shelves Safe: The Checks That Matter
Safety is the part most shelving guides skip, and it matters most in a baby's room. Check every shelf above a cot, changing table or play area against four things.
- Fix to the wall. Every unit taller than it is wide gets an anti-tip fixing. No exceptions.
- Check the load. A shelf rated for 10kg should carry no more than 10kg. Books are heavier than they look.
- Round the edges. Sand every exposed edge and corner on anything below 120cm.
- Keep the cot zone clear. Nothing heavy mounted directly above a cot. A shelf can stay up for years and still come down once.
Products sold as children's furniture in the UK are tested against the EN 71 toy safety standard, which covers stability and materials. Check for that marking on anything you buy rather than build.
Shop-Bought Shelving That Saves You the Build
Not everyone wants a drill in one hand and a spirit level in the other. Shop-bought shelving does the same job as a DIY build, often with better safety testing.
The AIYAPLAY Bear Bookcase (£49.99) is the closest shop equivalent to the crate build, and it solves the problem the DIY version cannot: depth.

If you need display and hidden storage in one piece, the 5-Cubby Bookshelf with 2 Storage Cabinets (£119.99) gives five open cubbies at child height plus a two-door cabinet.
Every one of these comes with our 30-day risk-free trial and next-day shipping, so if it does not fit the space, it goes back.
Conclusion
The hardest part of a small nursery is not finding storage. It is accepting that the floor is not where it goes. Build upwards, fix everything to the wall, and keep reachable shelves for what your child is allowed to touch.
If you would rather skip the drill and the sanding, The Nook and Nurture Company stocks shelving that arrives safety-tested, with anti-tip kits included, next-day shipping and a 30-day risk-free trial. Start with the AIYAPLAY Bear Bookcase for the narrowest gap in the room, and build out from there.
Frequently Asked Questions
How do you make DIY nursery shelves safe and secure?
Fix every shelf into masonry or into timber studs, never just plasterboard, and use wall plugs rated for the load. Keep the top shelf at least 60cm above the cot mattress so nothing can be pulled in, and never hang a shelf directly over the cot or changing mat. Add a lip or guardrail to open shelves so books cannot slide off, round off sharp edges with sandpaper, and check fixings every few months. Any freestanding unit, such as the AIYAPLAY Bear Bookcase at £49.99, should be anchored with its anti-tip kit.
What size shelves are best for a nursery?
For picture books, a shelf 60-80cm wide and 12-15cm deep is the sweet spot: deep enough for a book to sit back without overhanging, shallow enough that it does not crowd the room. Board books need around 15cm of depth, while display ledges only need 8-10cm. Keep individual shelf runs under 90cm so they do not sag under weight, and leave at least 25-30cm between shelves for taller books and toys.
What is the cheapest way to build shelving?
Timber batten and a single shelf board is the cheapest route: a 2.4m length of planed batten and one 1.8m white melamine board usually comes in under £25 from a timber merchant. Cut the batten into two brackets, screw them to the wall, and sit the board on top. Pine crates screwed together make a free-standing bookshelf for a similar outlay. Both take under an hour with a drill, a saw and a spirit level.
How do you add storage to a small nursery without taking up floor space?
Go vertical. Wall-mounted shelves, peg rails, hanging baskets and over-door hooks all use the wall rather than the floor. A shelf at 150cm keeps breakables out of reach while the space underneath stays clear for a cot or changing table. Slim pieces help too: the 5-drawer nursery dresser is 30cm deep and 100cm wide, and the AIYAPLAY Bear Bookcase is just 15cm deep, so both sit flush against a wall without eating into the room.
How do you style nursery shelves so they look tidy?
Work in threes: one stack of books, one basket or box, one decorative item per shelf run. Group books by colour or height, keep baskets uniform, and leave roughly a third of each shelf empty so it does not read as cluttered. Put the things your child uses most on the bottom shelf and the decorative pieces up high. Rotate toys and books every few weeks rather than adding more shelves.


